
“Back in the Day ” if you wanted to obtain employment in the field of Installing Automation equipment you would probably have needed to have served a 4 year apprenticeship in mechanical fitting. That is probably still true today but companies training mechanical fitters are less and less, but all is not lost, in todays modern world it is possible to either go to college and maybe take a NVQ diploma and if you show a technical attitude you may be lucky to get a job assembling equipment in a workshop then biding your time to go on the road with that company. Assuming you can get employment and then want to go out on sites you will probably need other certificates to cement your position. To be a mechanical installer you will need to show a hands-on dexterity, basic mathematical skills and an ability to read drawings and manuals. It is important to have a personality that can get on well in a team situation or also to have the confidence to work independently.
In my experience one of the fundamental skills that is required of a Mechanical Technician or Fitter is the ability to read Engineering drawings, whether it be an overall layout of the factory where the Installation is taking place, a detailed breakdown of the machinery dimensions or a Technical Manual of the full machine. Asking a mechanical technician to install automation without being able to read engineering drawings is like asking a chef to bake a complex souffle while blindfolded—you might get something edible, but it’s probably going to collapse. In the world of robotics and automation, precision isn’t just a goal; it’s the baseline. Here is why that skill is non-negotiable:
1. Precision and Tolerances
Automation relies on repeatable, exact movements. Engineering drawings specify GD&T (Geometric Dimensioning and Tolerancing), which tells the technician exactly how much “wiggle room” exists. If a robotic arm base is off by even a fraction of a millimeter because a technician misread a datum feature, the entire production line could fail down the road.
2. Assembly Sequencing
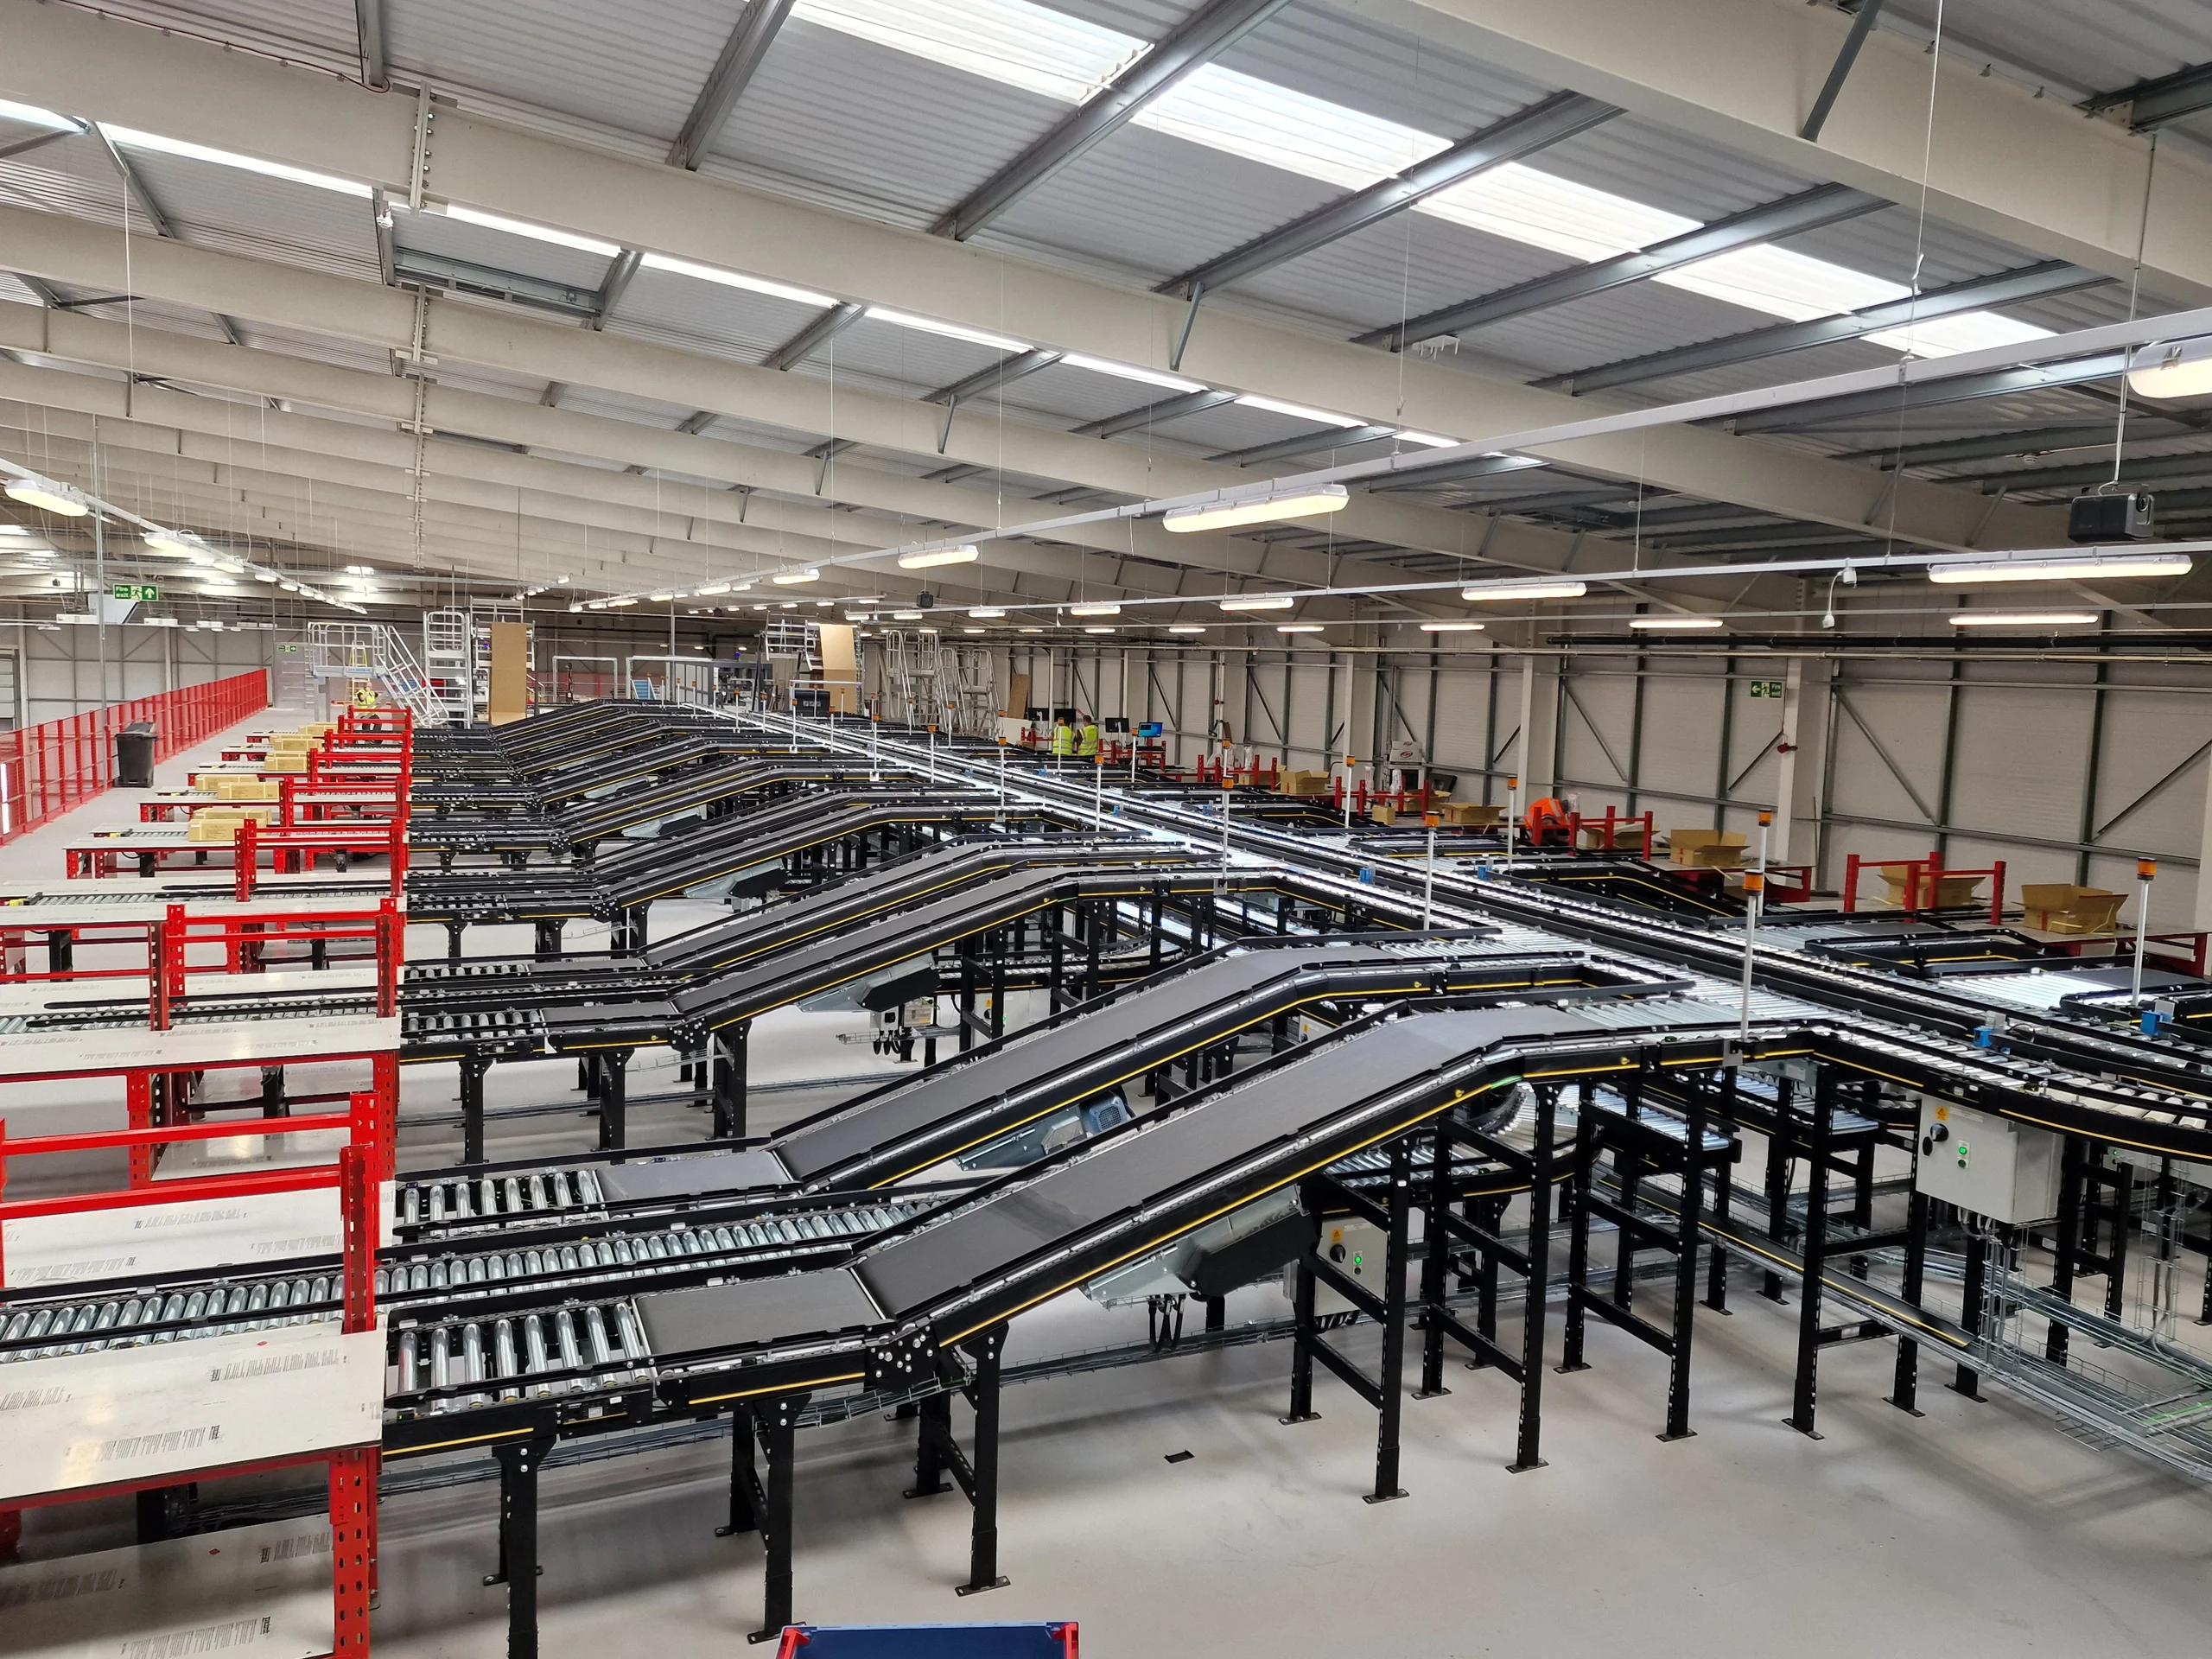
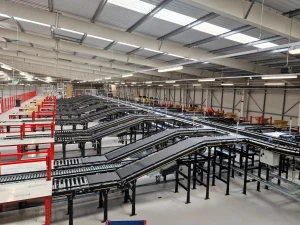
Robotic cells are packed with sensors, pneumatic lines, and complex bracketry. Drawings (especially Exploded View drawings) provide the “map” for the build. Without them, a technician might install a component in a way that blocks access to a critical sensor or prevents a safety gate from closing properly.
3. Safety and Structural Integrity
Automation involves high speeds and heavy forces. Engineering drawings specify:
Fastener torque specs: Ensuring bolts don’t shear or loosen under vibration.
Load-bearing points: Ensuring the robot is anchored to the floor or gantry correctly.
Clearance zones: Marking “no-go” areas where the robot’s reach could cause a collision.
4. Communication and Troubleshooting
The drawing is the “source of truth” between the engineer who designed the system and the technician building it. If a part doesn’t fit, the technician needs to read the drawing to determine if the part was manufactured incorrectly or if they are simply installing it backward.
The Technician’s “Mental Toolkit”
So as well as having the correct tools for the job, the Installation Technician has to acquire a fair amount of knowledge to make himself a valuable asset to a company. Beyond just “looking at the picture,” a top-tier technician needs to understand:
Orthographic Projections: Visualizing a 3D object from 2D top, front, and side views.
BOM (Bill of Materials): Identifying exactly which screw, motor, or plate goes where. Usually if one is on a new installation is best to check that all the parts that are supposed to be there have arrived. May sound like a crazy thing but I have known it to happen where parts have not been sent and panic sets in and Taxis are ordered to bring parts, obviously the qicker this can be relayed back to the Main Office the more chance the situation can be retrieved. Also watch out for danaged or broken parts (does happen in Transit).
Schematics: Understanding how the pneumatic or hydraulic lines integrate with the mechanical frame. A valuable knowledge I have found is to know the standard pneumatic symbols for when you are piping up machines and pneumatic cabinets.
While a Technician might be able to “bolt things together,” a professional who understands drawings ensures the system is safe, functional, and durable. It’s the difference between a “mechanical assembly” and a “precision instrument.”
Assuming your employer is happy with your hands-on experience then you will need some other paperwork to get onto a customers site. A CSCS card is the usual minimal requirement for factory automation work whilst the CCSNG safety passport is required for Construction & some Engineering work sites. If you are contemplating pursuing a career down the contracting path it is advisable to have both thus covering all options. What are the rules and costs of these cards ?
The CSCS card is issued by the (Construction Skills Certification Scheme) in the UK and more details can be found at http://www.cscs.uk.com The card lasts for 5 years before you need to renew, it costs £36 plus a mandatory Health & Safety Test of £22.50 so total cost is £58.50 (it is free for an apprentice during the training period). The test is a multiple choice done on screen at one of the local test places that can be found on their website.
The CCNSG safety passport is a 2 day course costing £155 and lasts for 3 years before renewal, details can be found at http://www.ecitb.org.uk it is issued by the Engineering & Construction Industry Training Board and is mainly a Health & Safety Certificate and is a prerequisite for site entry on Construction sites. So both these schemes deal mainly with the Health & Safety aspect but in the case of the CSCS card depending on the level or skill that you are trying to attain you will have to provide some evidence that you hold the qualifications. A further layer of security is sometimes asked for by customer sites, Companies are using a third party verification company to check out the details of your qualifications/past work history and some want background disclosure checks from Government agencies.
So we can get on site, then what ? well you will be designated a “Person of Contact” (usually the Project Engineer or Manager) then each day you will have to sign on the Permit before starting any work, this is usually compulsory depending on the customers site, then you will be allowed on to where the actual work is taking place. Obviously it is your Person of Contact who issued the permit to make sure the area has finished any production in that area or be aware of any hazards that are around. When getting to your place of work if it is previously been a “live” site then LOTO safety procedures must be used (That will be covered in a further posting).When all is safe to go, make sure you wear all the required PPE, sites do vary as to what is mandatory, make sure you stick to all the safety procedures, nowadays people come around checking and watching then reporting back to the Safety Officer, some companies have a policy for studying cameras that are in the location, so there should be no short cuts on safe working procedures. At the end of a safe and hopefully fruitful day, LOTO might need to be reversed to let equipment go live again, or maybe its a new installation and nothing live yet, Permits will need to be signed off with the Person of Contact.
Is there anything else required, well from a work experience it may be worth having the following
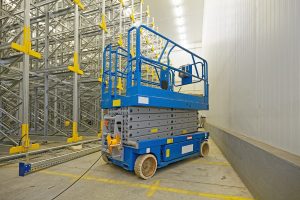
IPAF Licence, PAL card (Powered Access Licence) – for operators of a mobile elevating work platform. This is valid for 5 years and requires the operator to take a day course and pass the test at the end.. The courses take place at local accredited centres and costs are around £350 per operator but can depend on how many categories you wish to operate.
Incorporate a Safety Harness Practical Training course in with the IPAF plus see Our ( WORKING AT HEIGHTS POST )

Robotics Install Pre-Checklist Guide
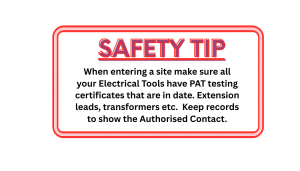
It is very important that when a Company gets the installation contract either directly or through a machinery & automation manufacturer that in the initial talks details are ironed out regarding the access and requirements of : peronnel gaining access to site, PPE requirements, PAT testing of Electrical items ( most companies accept a copy of the Record of Certificates of the items been brought on site) some Companies requiring their own people test it, again sort out before its too late. Certificates for Harnesses, Slings, Shackles may also be required as well as copies of Fork Truck licences ( If you are using) and IPAF licences.
The first day of an install is usually a mix of controlled chaos and heavy lifting. Having a mental (or physical) checklist prevents that “wait, we forgot the floor anchors” moment that can stall a project for hours.
Phase 1: Documentation & Verification
Before you even crack open a toolbox, make sure the “paperwork” matches the reality of the floor.
[ ] Revision Check: Is your drawing the latest version? Look for the “Rev” number in the bottom right corner (e.g., Rev C).
[ ] BOM Audit: Do you actually have all the parts listed on the Bill of Materials? Check for the big stuff (motors, robots) and the small stuff (specific bolts/washers).
[ ] Layout Marking: Use a laser level or chalk line to “snap” the centre lines of the cell onto the factory floor based on the master layout drawing.
Phase 2: Site & Safety Prep
[ ] Power & Air: Locate the drop points for electricity and compressed air. Are they where the drawing says they should be?
[ ] Floor Condition: Is the concrete level and thick enough to bolt down a multi-axis robot? (Check the drawing for “Minimum Floor Requirements”).
[ ] LOTO (Lockout/Tagout): Ensure you have your own padlocks and tags. Never work on a line that isn’t de-energized and locked. (VERY IMPORTANT SAFETY ITEM)
Phase 3: The “Consumables” Kit
These are the things people always forget to bring, but are essential for a professional finish:
[ ] Thread-locker: (e.g., Blue Loctite 242) for bolts subject to vibration.
[ ] Shims: A variety pack of stainless steel shims (0.1mm to 1.0mm) to level the robot base.
[ ] Floor Anchors: The specific size and grade (usually Wedge Anchors or Epoxy) called for in the prints.
- [ ] Cleaning Supplies: This is part of the Trade that is often overlooked and can in fact catch a squad of installers out, a lot of sites that I have worked on lately send an assigned Manager around to check the site after each daily completion ( but its always good standard practice for any Engineers) making sure its safe and clean. To this end its important to have access to a Vacuum cleaner to remove the dust particles when drilling the floor for anchor bolts. Dust pan, broom and rubbish bags kept in the site box is a must. Degreaser and lint-free rags to clean mounting surfaces before assembly. If your working on Stainless Steel parts then baby oil is a good greasy handprint remover but that’s best left for the Commissioning phase.
Phase 4: Final Mechanical Sweep
[ ] Clearance Check: Manually move the robot arm (if possible) or use a template to ensure it won’t hit any pillars, fences, or conveyors at its maximum reach.
[ ] Torque Verification: Once bolted, mark the bolt heads with a “Torque Stripe” (a paint pen line). This shows at a glance that the bolt has been torqued and hasn’t vibrated loose.
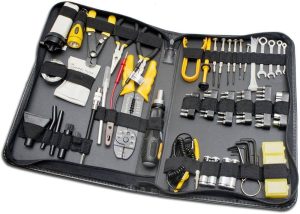
YOUR Mechanical Technicians/Fitters basic Installation Toolkit.
Most experienced personnel will have their own toolboxes, some people keep some boxes for in the workshop use and they also have another lighter box that they use on site. For a bare minimum that you would need I can give a brief list ( I will cover more deeper-dive in to Mechanical tool kits in other Posts).
For a mechanical technician specializing in automation, your kit needs to prioritize precision and access (getting into tight spots inside a robot cell).Usually depending on the size of the installation and the Company doing it (either main supplier or a Contracting Company) a Site Box is normally placed on-site for securing all specialist tools required and extension leads, power tools etc. Again depending on the type and size of the Installation several site tool boxes may be supplied or even a container so individuals can keep their equipment safe in there.
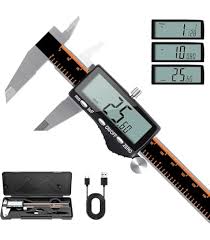
Measuring Equipment
6″ or 12″ Digital Calipers: For verifying part dimensions and bolt diameters. I use Mitutoyo 150mm caliper.
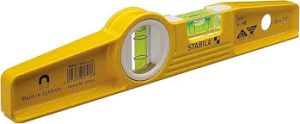
Magnetic Torpedo Level: Essential for levelling base plates and conveyor sections. Just a caution on “magnetic” not if its stainless steel conveyor hung up in the air !!
Tape Measure (Metric/Imperial): Most automation is designed in metric, but you’ll often be mounting it to an imperial factory floor, 8m solid one for floorwork and a 3m for quick and local dimensions.
- I would also add a plumb bob and line to pick up centre lines marked on the floor, Feeler gauges, a square, steel rule, scriber, centre pop.
Hand Tools (The “Must-Haves”)
Metric Allen Key Set (Hex Keys): Almost all robotics (Fanuc, ABB, KUKA) use metric hex fasteners. Get a “ball-end” set for awkward angles.
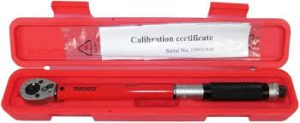
Torque Wrench: Critical. Over-tightening a bolt on a precision gearbox can ruin it; under-tightening can cause a crash.
Combination Wrenches & Socket Set: Focus on 8mm through 19mm. The usual suspects 8/10/13/17/19 but always good to have a full set as pneumatic fittings can be 12/14/15.and very useful to have a 24mm in your toolbox.
- Add to those a Hacksaw, Junior Hacksaw, Stanley knife, pneumatic pipe cutters, screwdriver set, set of pin punches and tapered drifts-pinch bars for aligning holes prior to bolting.
Dead Blow Hammer: For nudging parts into alignment without marring the metal surfaces and a light weight ball-peen hammer for centre popping.
This post contains Amazon affiliate links. If you click through and make a purchase, I may receive a small commission at no extra cost to you


- Nine piece metric high torque hex key set with two component clip for storage
- Wera hex-plus technology prevents rounding of screw recess and transfers up to 20% more torque
- Coloured thermoplastic sleeves ensures comfortable and fast tool selection

- AOS (Advanced Onsite Sensor) induction type encoder used in top-of-the-line ABS coolant-proof calipers.
- The slider provides smooth, easy action.

STABILA Type81S 10-inch/25cm Spirit Level with Holster.
- Accurate to 0.5mm/m in the normal position and 0.75mm/m in overhead position.
- Extremely sturdy with electrostatic powder coating for scratch resistance and easy cleaning.
- Complete with belt pouch.
- Vials are guaranteed to remain accurate for 10 years.